When creating websites within Microsoft Power Pages and the Power Platform, consistency and ease of use are key. You want to build sites that are easy to maintain, look professional, and align with your brand. This is where content snippets play a huge role.
Content snippets are small, reusable blocks of text, or even HTML, that are inserted across your Power Pages site. Instead of rewriting code in multiple places in your website, these are dynamically added wherever you need it implemented.
What are Content Snippets?
Microsoft defines Content Snippets as “small chunks of editable content that can be placed by a developer in a header, footer, web page or a web template, allowing for customizable content to populate any portion of a webpage’s layout easily” (“Customize Content by Using Content Snippets”).
Content Snippets are key-value pairs. The key is the name of the content snippet. This is the name that will be referenced in your code if needed. The value is the markup (text, HTML, or JavaScript) that will be implemented across your site. Think of them as placeholders that define content once and use it in multiple locations.
Examples of Common Uses:
- Site Name Customization
- Custom Site Logo
- Footer Copyright Text
- Login Page Modifications
- Registration Modifications
- Custom JavaScript Integrations
Some Content Snippets are pre-generated after creating a Power Pages site. They include common functionalities such as Footer, Site Name, Logo URL, and more. These are quite easy to modify and are very useful. For example, to update the default copyright text displayed at the bottom of all sites, the Footer Content Snippet must be modified by replacing the current text with your new desired entry.
How to Access Content Snippets?
Accessing Content Snippets is not immediately obvious if you are working within Power Pages Design Studio, but it is quite simple once you know where to look.
- Open the Design Studio for your Power Pages site.
- On the left side of the navigation bar, scroll past the security section.
- Click on the Extras button (the three dots icon).
- From the dropdown, click Power Pages Management.
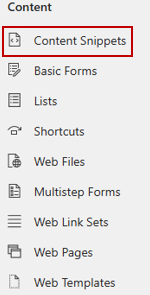
This will open up the Power Pages Management workspace, where you can dive deeper into settings and data behind your website. On the left side, in the Content section, you will now see Content Snippets.
Once inside the Content Snippets area, you can:
- Create new snippets for reusable content.
- Find existing snippets to quickly locate what you need.
- Edit snippet content, and updates will apply site-wide automatically.
Tailoring Content Snippets for Your Site
While many of the content snippets are designed to tweak out-of-the-box components, like the copyright text in the footer, you can take them much further. Some of the most powerful use cases involve modifying pages that normally are not editable in Power Pages Design Studio.
For instance, if you have applied a custom CSS theme across your site, the sign-in page typically will not inherit those changes. With the help from content snippets, even that page becomes customizable, allowing you to extend your user experience and branding consistently across the entire site.
One of my favorite content snippets is Account/SignIn/PageCopy. This snippet allows you to customize the sign-in page by adding custom CSS, and even using JavaScript, including advanced techniques such as Mutation Observers to modify the page elements dynamically. Account/SignIn/PageCopy is not created by default, so you will need to add it. By using a simple style script, specific items can be modified such as the sign-in button.
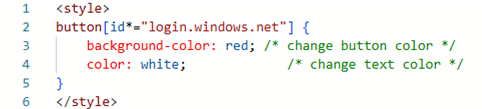
Keep in mind the proper ID will need to be used to target the desired element. As shown above, button[id*=“login.windows.net”] will target the Microsoft Entra ID sign-in button. See the visual changes below:

Inserting Content Snippets with Liquid
Content snippets in Power Pages can also be inserted using liquid statements. This approach works best in pages that are custom design, and not pages using the out-of-the-box components. For pages that are custom designed, there are three ways content snippets can be added:
- {% include ‘snippet’ snippet_name:'<<snippet name>>’ %}
- {{ snippets[“<<snippet name>>”] }}
- {% editable snippets ‘<<snippet name>>’ %}
For example, here is a content snippet below:
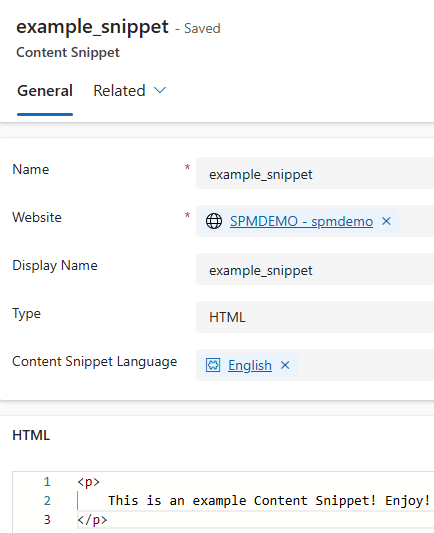
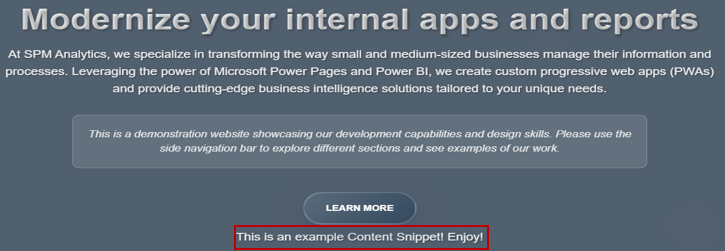
By using {{ snippets[“example_snippet”] }} in page template HTML, the text “This is an example Content Snippet! Enjoy!” is dynamically inserted into the page of choice at the specified location. In this case, the home page. See the home page below:
Final Thoughts
Content snippets in Power Pages are small but extremely powerful tools for managing consistency, branding, and content. By having centralized updates, they reduce site wide edits and ensure easy maintainability.
Whether you are managing a client portal, customer self-service website, or customer relationship management tool, content snippets simplify workflows and give you much larger control over your site. Keep building great pages, one snippet at a time!